Hey there, fellow marshmallow enthusiasts! It’s time to master the art of crafting homemade marshmallows that are bound to steal the spotlight at any gathering.
You know that magical feeling when the air turns crisper, and the scent of seasonal delights wafts through the kitchen?
Well, if you’re anything like me, that’s the signal to roll up your sleeves and embark on a marshmallow-making adventure!
Oh yes, we’re diving headfirst into the world of crafting our very own homemade marshmallows, but with a twist that’s going to tickle your taste buds and warm your heart.
In this guide, we’re not just whipping up your run-of-the-mill marshmallows; we’re stirring in a healthier touch that’s going to make you do a happy dance.
Say goodbye to corn syrup and hello to the good stuff – honey, maple syrup, and high-quality gelatin that’ll make your marshmallow dreams come true.
Now, before you start envisioning a health-nut version of marshmallows that taste like cardboard, let me assure you – these little delights might just make your sweet tooth swoon.
Sure, there’s still a cup of sugar in the mix, but trust me, it’s a far cry from the mysteries lurking in the store-bought variety.
So, consider this your golden ticket to homemade marshmallow paradise – where sweet meets wholesome and crafting becomes a labor of love.
Are you ready to delve into the science, the art, and the sheer joy of crafting your very own fluffy, melt-in-your-mouth wonders?
Well, put on that apron, gather your ingredients, and let’s embark on a journey that promises deliciousness, creativity, and a whole lot of sticky fun!
Stay tuned as we delve into the world of homemade marshmallows – where science meets scrumptiousness and creativity reigns supreme.
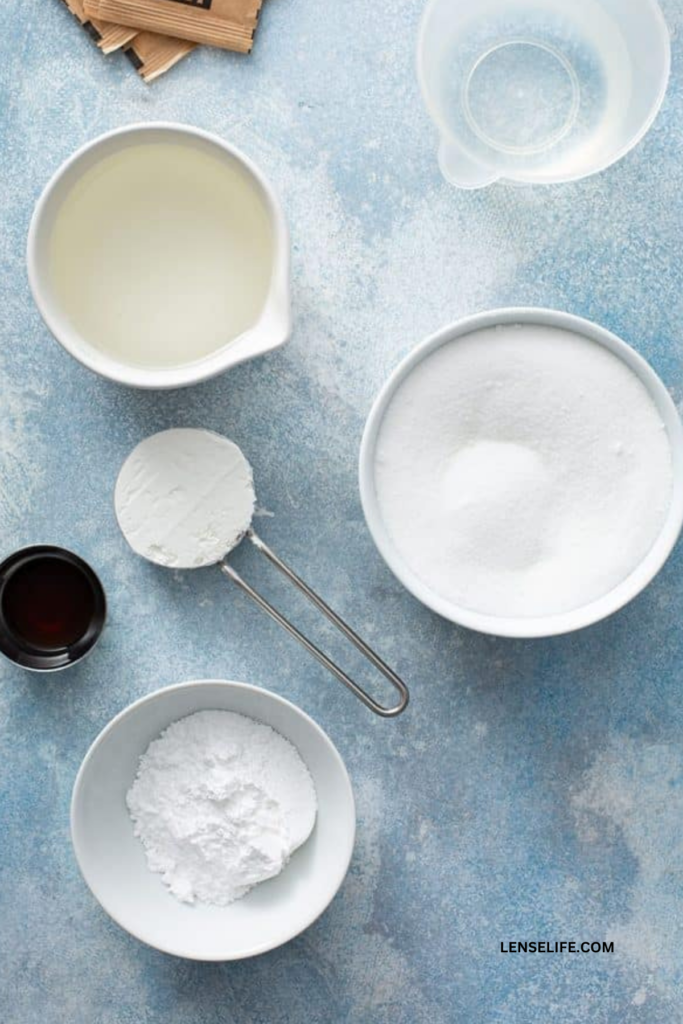
Homemade Marshmallows Ingredients
Before we dive headfirst into the fluff-tastic world of homemade marshmallows, let’s take a little detour into the fascinating realm of marshmallow science.
Don’t worry – no lab coats required, just a curious appetite and a sprinkle of excitement!
- Gelatin: This is our star ingredient, responsible for that pillowy texture. Opt for high-quality, pasture-raised, grass-fed, non-GMO, and gluten-free gelatin.
- Sweeteners: Say goodbye to corn syrup and hello to healthier options. You’ll need honey, maple syrup, or a mix of both to add sweetness and unique flavors.
- Organic Powdered Sugar: It’s not just for sweetness – this keeps your marshmallows from getting too sticky. You can also use arrowroot powder or a combination of both.
- Flavor Enhancers: Get creative with vanilla bean, fruit extracts, or chocolate additions to customize the flavor of your marshmallows.
- Colors: Whether you prefer natural colorings or food dyes, these let you add a pop of vibrancy to your marshmallows.
- Mix-Ins: Chopped nuts, mini chocolate chips, or dried fruit are your ticket to surprise bursts of flavor and texture.
Now that you’re acquainted with your ingredients, let’s dive into the step-by-step recipe guide to craft your homemade marshmallows.
It’s like a dance of sweet sensations in your mouth, and you’re the choreographer!
How to Make Homemade Marshmallows
Welcome to the heart of the marshmallow-making adventure – where sugar becomes syrup, and syrup becomes fluffy dreams.
Get ready to roll up your sleeves and channel your inner culinary wizard, because we’re about to create a symphony of sweetness that’ll have your taste buds dancing!
Step 1: Gather Your Tools and Ingredients
Ensure you have all your tools and ingredients ready, including a candy thermometer, mixing bowls, whisk, and a square pan lined with parchment paper.
Step 2: Prepare the Gelatin
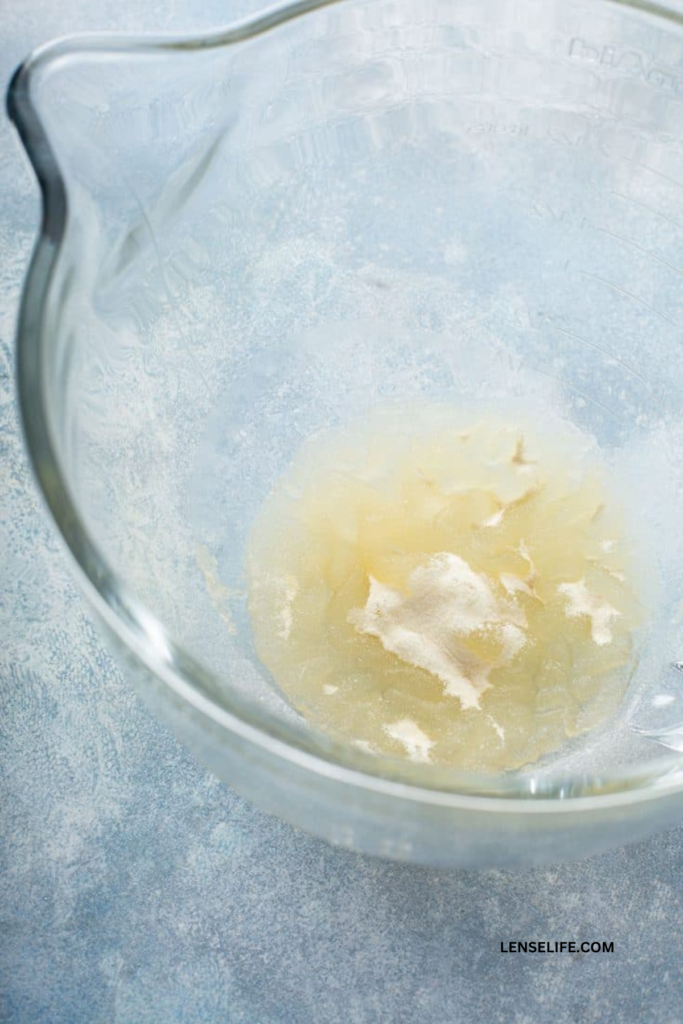
In a mixing bowl, combine cold water with gelatin. Allow it to bloom while you prepare the sugar syrup.
Step 3: Craft the Sugar Syrup

Our goal? Achieving the legendary “soft ball” stage at a toasty 240 degrees Fahrenheit.
But hold your candy thermometers – there’s a little secret I’m about to spill. While you’re free to stir the syrup during its early moments, once you’ve given it a whirl for the first minute, it’s time to let it do its thing.
Yep, resist that stirring urge! Stirring after this point could unleash a bubbly rebellion, and trust me, you don’t want your kitchen looking like a marshmallow volcano erupted.
Speaking of eruptions, keep an eagle eye on that syrup pot. Vigilance is the name of the game here.
That syrup can be a bit mischievous and decide to boil over if you’re not careful.
So, grab your apron and your readiness to embrace the unexpected – we’re creating sugar syrup magic that’ll set the stage for marshmallow greatness.
Step 4: Whip Up the Fluff
Now that you’ve tamed the sugar syrup beast, it’s time for the ultimate transformation – turning that syrup into a fluffy cloud that’ll leave you in awe.
Slowly pour the hot sugar syrup into the gelatin mixture while whisking continuously.
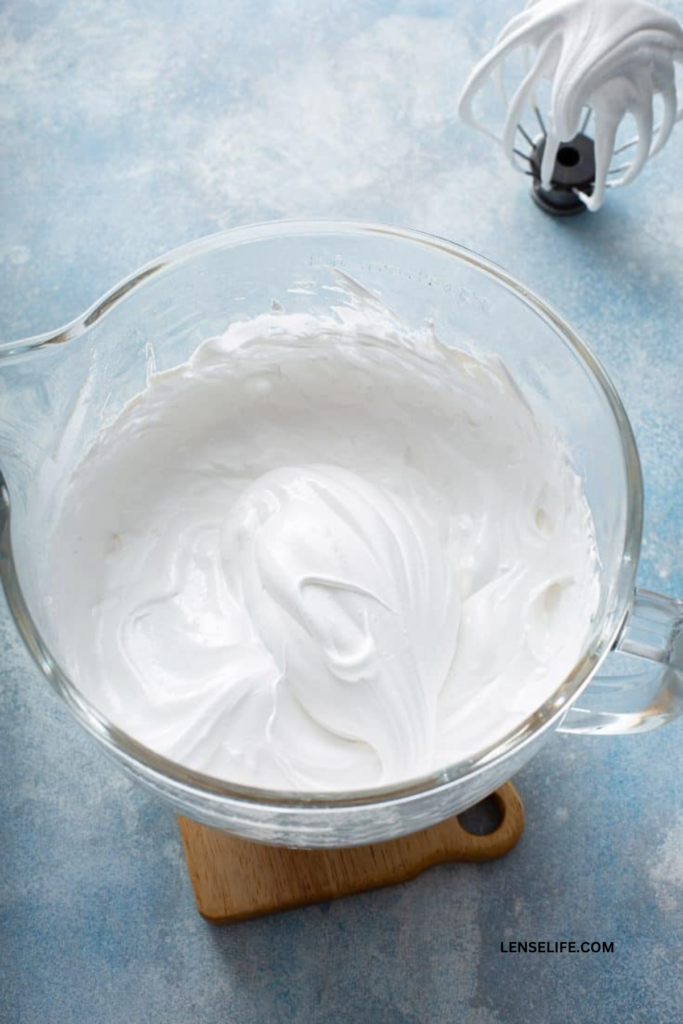
Once combined, whip the mixture with a hand or stand mixer until it turns into a fluffy cloud with stiff peaks. Avoid over-beating, which can lead to a taffy-like consistency.
Step 5: Customize and Shape
Add flavor enhancers and colors as desired, and gently fold in any mix-ins. Pour the marshmallow fluff into your prepared square pan, smoothing the top.
Step 6: Set and Cut
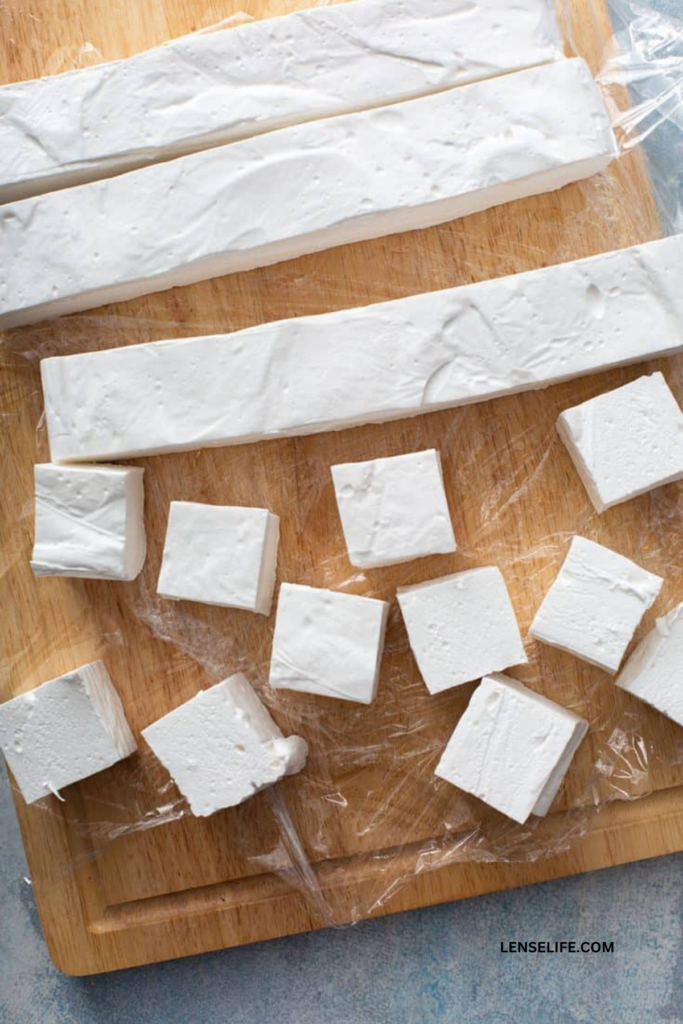
Allow your marshmallows to set for several hours or overnight at room temperature. Once set, lift the marshmallow block out of the pan using the parchment paper and place it on a cutting board. Use a knife or cookie cutters to shape your marshmallows.
Step 7: Savor and Share
Your homemade marshmallows are ready to savor! Store them in a sealed container on your kitchen counter, and enjoy them in classic pairings, baking, or any creative way you desire.
Personalization and Creativity
Alright, marshmallow maestros, it’s time to sprinkle some of your unique magic into the mix!
Get ready to channel your inner artist and dive into the wonderful world of marshmallow personalization.
We’re not just making homemade marshmallows here; we’re crafting little bites of pure creativity that’ll have your taste buds and imagination doing a happy dance.
Customizing Your Marshmallows: Flavors and Colors Galore
Now that you’ve mastered the art of marshmallow creation, it’s time to play with flavors that’ll make your homemade marshmallows stand out from the crowd.
Vanilla bean, fruit extracts, or even a dash of chocolate – the possibilities are as endless as your imagination.
Think of your marshmallows as a blank canvas, and you’re the painter with a palette of flavors at your fingertips.
But wait, there’s more – colors! Say goodbye to boring white marshmallows and say hello to a vibrant rainbow of options.
Whether you’re a fan of natural colorings or you’re ready to embrace the rainbow with some food dyes, this is your chance to let your marshmallows shine in a kaleidoscope of hues.
Adding Mix-Ins and Crafting Shapes
Hold on to your aprons, because we’re about to take your marshmallow game to the next level.
Imagine sinking your teeth into marshmallows studded with chopped nuts, mini chocolate chips, or even bits of dried fruit.
It’s like a surprise party for your taste buds with every bite!
And speaking of parties, let’s talk shapes. We’re breaking free from the shackles of square marshmallows and venturing into a realm of endless possibilities.
Cookie-cutter shapes that match the occasion? Absolutely. Mini marshmallows that are perfect for snacking or stirring into a cup of cocoa? You got it.
This homemade marshmallow world is your oyster, and you’re the fearless explorer on a quest for the most delightful shapes.
Teasing Your Taste Buds for What’s to Come
Hold on to your marshmallow toasting sticks, because in the next segment, we’re going to tackle some marshmallow-making hurdles with the finesse of a seasoned chef.
From avoiding sticky situations to mastering the art of temperature control, we’ve got your back every step of the way.
So, if you’ve ever wondered how to troubleshoot your way to homemade marshmallow success, get ready for some expert tips that’ll turn you into a marshmallow ninja.
But for now, let’s revel in the delight of personalization and creativity.
Whether you’re dreaming of a marshmallow masterpiece that’s bursting with flavors or you’re eager to experiment with shapes and colors that defy convention, your marshmallow adventure is only just beginning.
So, grab your marshmallow dreams and let’s turn them into scrumptious reality!
Expert Tips for Marshmallow Success
Alright, my fellow marshmallow adventurers, it’s time to don your marshmallow ninja gear as we navigate the marshmallow-making maze with the finesse of a seasoned pro.
We’re about to tackle the hurdles, sidestep the sticky situations, and emerge victorious with marshmallows that’ll have you basking in the glory of culinary success.
Navigating Potential Pitfalls
Let’s face it – every journey has its bumps, and marshmallow-making is no exception.
But fear not, for I’m here to guide you through the homemade marshmallow minefield and help you avoid the common pitfalls that can turn your kitchen into a sticky battlefield.
Ever wondered why your marshmallows turned out more like superglue than fluffy clouds? Well, I’ve got the inside scoop on how to avoid that sticky mess.
Say hello to the dynamic duo of organic powdered sugar and arrowroot powder.
These trusty sidekicks are here to prevent stickiness and keep your marshmallows soaring to new heights.
The Tricky Aspects: A Delicate Dance
As we continue our marshmallow mastery, let’s take a moment to appreciate the subtleties of the craft.
One wrong move, and your homemade marshmallow fluff could go from cloud-like perfection to a taffy nightmare.
We’re talking about the art of beating – that sweet spot between fluffiness and the dreaded taffy takeover.
When you’re whisking away, remember that less is often more. Over-beating can quickly transform your marshmallow dreams into a taffy reality, and trust me, that’s not a dance you want to be doing.
So, keep a watchful eye on your mixing endeavors, and you’ll be rewarded with marshmallow fluff that’s a dream to work with.
And let’s not forget the role of temperature in this delicate dance. It’s like finding the perfect tempo for a marshmallow waltz.
As your sugar syrup heats up, you might notice it jumping to 220 degrees Fahrenheit in a flash. Don’t fret – that’s completely normal.
The journey from 220 to our magic number of 240 might take a bit longer, but hey, good things come to those who wait.
Storing and Enjoying Freshness
Before you dive into a marshmallow feast, let’s chat about the fine art of preserving those fluffy wonders.
You see, because we’ve kicked out the preservatives, our homemade marshmallows are like fleeting stars in the culinary galaxy – they shine bright but for a limited time.
Fear not, though, for I’ve got the insider tips to keep your marshmallows at their prime. It’s all about the power of a sealed container.
Due to the presence of natural components and the absence of preservatives, it’s advisable to consume these marshmallows within one or two days.
Simply store them in an airtight container on the kitchen counter (refrain from refrigeration).
Culinary Adventures with Homemade Marshmallows
Now that you’ve got your stash of marshmallow treasures, it’s time to embark on some culinary escapades that’ll leave your taste buds in awe.
We’re talking about timeless pairings that have stood the test of time and marshmallow’s role in creating confectionery wonders.
First up, the classic hot chocolate– that warm, comforting embrace in a cup.
Picture yourself cozied up by the fireplace, a mug of steaming hot chocolate cradled in your hands, and a homemade marshmallow slowly melting into creamy perfection on the surface.
It’s a match made in marshmallow heaven, and you’re the maestro behind the masterpiece.
And let’s not forget the legendary s’mores – a campfire favorite that’s all about gooey goodness.
Your homemade marshmallows are about to take this treat to a whole new level.
Imagine the gooey delight as your marshmallow, perfectly toasted, meets chocolate and graham crackers in a symphony of flavors and textures.
But wait, there’s more! Your marshmallows aren’t just for snacking or pairing with warm beverages.
They’re also your secret weapon in the world of baking. From brownies that have a fluffy surprise in every bite to blondies that’ll make your taste buds sing, your marshmallows are the star ingredient that’ll elevate your baked creations to a whole new level.
Conclusion: Crafting Memories, One Marshmallow at a Time
And there you have it, my marshmallow-loving friends – you’ve journeyed from curious readers to bona fide marshmallow maestros.
As we wrap up this delightful escapade into the world of homemade marshmallows, take a moment to relish in the sweetness of your culinary triumphs and the memories you’ve created along the way.
A Wholesome Transformation
From the very beginning, we embarked on a mission to transform the world of marshmallows.
We waved goodbye to the mysteries of corn syrup and welcomed the embrace of honey and maple syrup.
We traded questionable ingredients for high-quality gelatin and sprinkled in a touch of personalization magic that turned each marshmallow into a masterpiece.
As you bite into a homemade marshmallow, know that you’re not just savoring a sweet treat – you’re savoring a journey that’s taken you from the ordinary to the extraordinary.
It’s a transformation that’s as delicious as it is heartwarming, and your taste buds are undoubtedly grateful for the upgrade.
Crafting and Personalizing: More Than Just a Recipe
But this adventure wasn’t just about whipping up a batch of marshmallows; it was about the journey itself.
It was about the joy of stirring sugar syrups and the anticipation of watching fluffy clouds form.
It was about experimenting with flavors, colors, and shapes, and embracing the creative spirit that lives within each of us.
Think about it – every marshmallow you’ve crafted is a reflection of your unique personality and taste.
It’s a little piece of you nestled within each sweet bite. So, as you savor your homemade marshmallow creations, take a moment to reflect on the rewarding process of crafting and personalizing.
It’s a testament to your culinary prowess and your ability to turn simple ingredients into works of art.
And that, my friend, wraps up our marshmallow adventure! If you have any more culinary quests or delightful explorations in mind, feel free to let me know.
Until then, happy marshmallow-making and savoring!
Frequently Asked Questions
Homemade marshmallows are crafted with high-quality gelatin, honey or maple syrup (no corn syrup here!), and a dash of creativity, making them healthier, tastier, and more personal.
Embrace your marshmallow creations in imaginative pairings, share them with loved ones, and explore new flavors and shapes to keep the marshmallow magic alive!
Absolutely! Elevate your baking game by adding marshmallows to brownies, blondies, and other delectable treats.
Prevent stickiness using organic powdered sugar and arrowroot powder. When beating the marshmallow fluff, avoid overdoing it to prevent a taffy-like consistency.
Indulge in timeless pairings like classic hot cocoa or elevate campfire fun with s’mores that feature your fluffy creations.
Get creative! Add chopped nuts, mini chocolate chips, or dried fruit for delightful surprises in every bite.
Homemade Marshmallows
Ingredients
- 1 cup water, divided
- 3 tbsp gelatin
- 1 cup honey, or maple syrup
- 1/4 tsp salt
- 1 vanilla bean, scraped (or 1 tsp vanilla extract)
- 1/2 cup organic powdered sugar
- 1/2 cup arrowroot powder
Instructions
- Pour 1/2 cup of water into the bowl of a stand mixer (set aside the beaters for now) and gently scatter the gelatin over the water's surface. Let the gelatin rest and expand for at least 10 minutes.
- While the gelatin is undergoing this process, combine the remaining 1/2 cup of water, honey, and salt in a small pot equipped with a candy thermometer. Heat the mixture over medium-high heat and stir exclusively for the initial minute, being vigilant to prevent any boiling over (*caution: stirring later in the cooking procedure could lead to the mixture overflowing). Cook until the temperature reaches 240 degrees Fahrenheit (recognized as the "soft ball" stage), requiring roughly 12-15 minutes.
- Initiate the stand mixer at a low setting to break down the gelatin, and cautiously drizzle the sugar mixture onto it. Gradually elevate the speed to high and whip until the mixture swells to triple its size, resembling the texture of marshmallow fluff and cooling to the touch. This operation should last around 8-10 minutes. During the final minute, introduce the vanilla bean or vanilla extract.
- During the whipping phase of the marshmallow, lay down parchment paper within a 9×9 pan. In a separate bowl, blend the powdered sugar and arrowroot powder, then sprinkle this mixture onto the parchment paper.
- Transfer the marshmallow mixture onto the pan and swiftly even out the surface using an offset spatula. Sprinkle an additional layer of the powdered sugar mixture on top and allow it to solidify for a minimum of 6 hours or overnight.
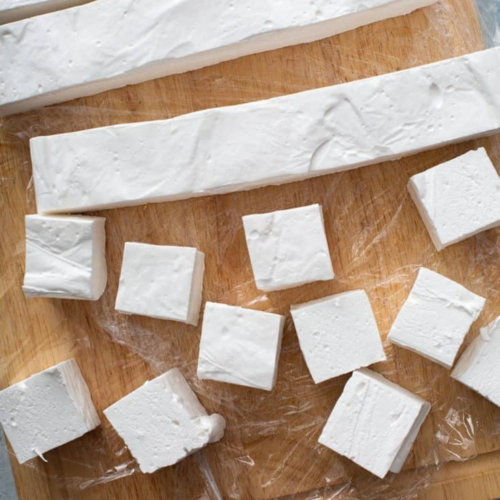
- Detach the parchment paper from the marshmallow sheet, and flip the marshmallow onto a cutting board that has been dusted with more of the powdered sugar mixture.
- Utilizing a sharp knife, carve the marshmallow into squares, applying extra powdered sugar mix as needed to avert sticking.
- Enjoy the marshmallows promptly or stow them in a container for 1-2 days.
